Identity management (IdM) integration capabilities in Quickbase, using the standard System for Cross-domain Identity Management (SCIM) specification, allow you to sync Quickbase with OneLogin.
Features supported
The following provisioning features are supported:
-
Create new users. New users created through OneLogin will also be created in your Quickbase account/realm.
-
Update user attributes. Updates made to the user’s attributes through OneLogin will be pushed to your Quickbase account/realm.
-
Deactivate users. Deactivating the user or disabling the user's access to the application through OneLogin will deny access for the user in your Quickbase account/realm.
-
Reactivate users. Reactivating the user through OneLogin will restore access for the user in your Quickbase account/realm.
Prerequisites
Before you configure provisioning for Quickbase, make sure you have:
-
Your Quickbase realm name.
-
Your realm admin user token. More about creating a user token
Sign in to OneLogin
-
Sign in to OneLogin with an account that has admin privileges.
-
Click Administration on the right in the top menu bar.

Configure Quickbase integration
-
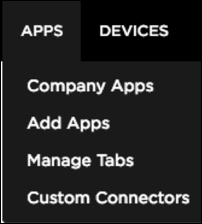
Select APPS from the top navigation bar in OneLogin, then select Add Apps.
-
Search for "Quickbase" and choose the entry with "Form-based auth, SAML2.0, browser extension, provisioning."

-
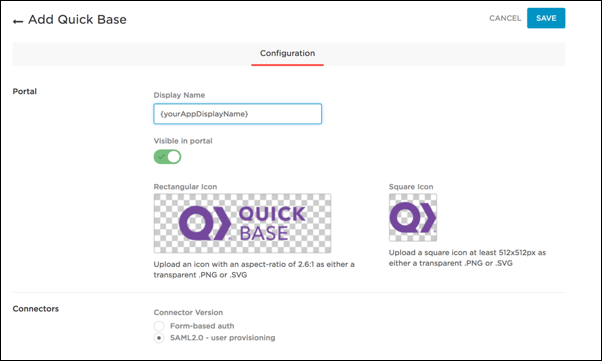
On the Configuration screen, enter a Display Name. For Connector Version, make sure SAML 2.0 is selected, then click SAVE.
-
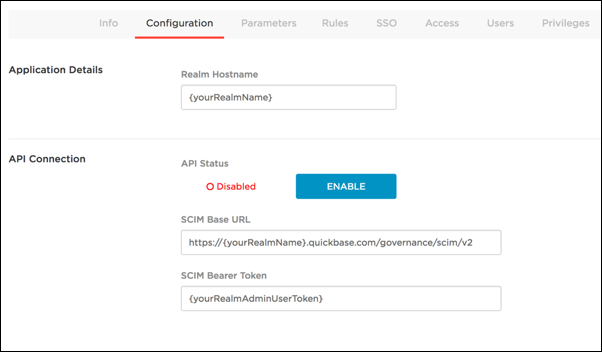
Select Configuration. Enter your Quickbase realm name, SCIM Base URL, and SCIM Bearer Token. In API Status, click the ENABLE button.
Note: Your SCIM Base URL is: https://{yourRealmName}.quickbase.com/governance/scim/v2
-
Select Parameters:
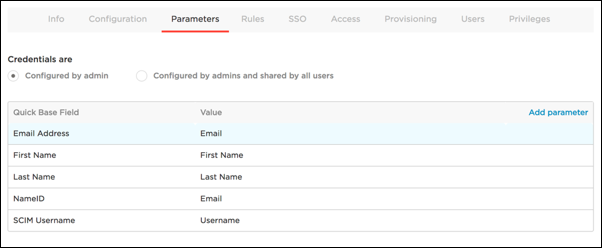
Add the following values:
Quickbase Field Value Email Address Email First Name First Name Last Name Last Name NameID Email SCIM Username Username -
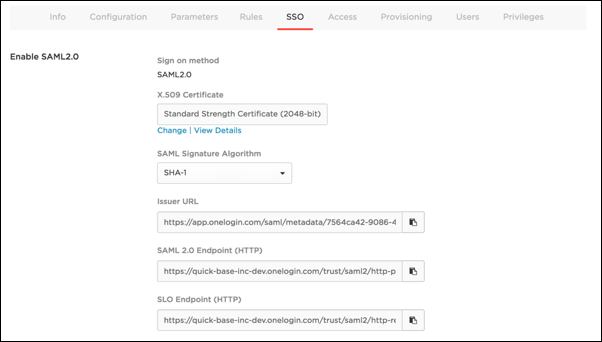
Select SSO. In the Enable SAML 2.0 section, copy and save all the SAML 2.0 information to another file. You will need to provide this information to Quickbase for your realm SAML configuration.
-
To save the certificate, click View Details and then click Download.
-
To save the Issuer URL and the SAML and SLO endpoint URLs, click the copy to clipboard icon, then paste the URLs into a text file of your SAML configuration information.
-
-
Select Provisioning:

In the Workflow section:
-
Check Enable provisioning.
-
Uncheck Create user, Delete user, and Update user.
-
For When users are deleted in OneLogin, select Suspend.
-
-
Click the SAVE button to save the settings in the Configuration, Parameters, SSO, and Provisioning sections.
Provisioning users
To create a new user in your OneLogin account, follow these steps:
-
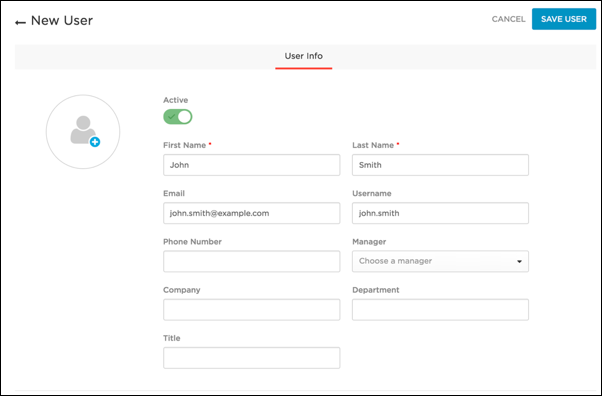
Select USERS, the click the NEW USER button.

-
Enter the user’s First name, Last name, Email, and Username, then click SAVE USER.
-
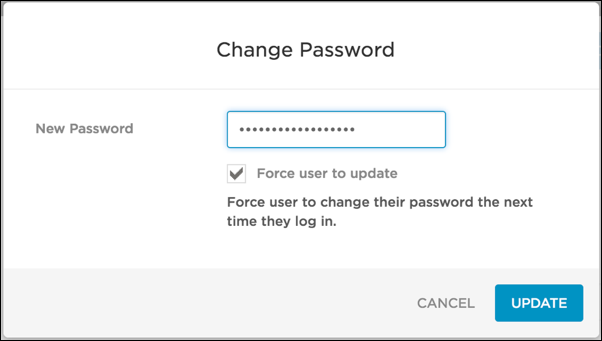
Click MORE ACTIONS and select Change Password.

-
Enter the password assigned for this user, which needs to be supplied to the user separately for their initial sign in, check Force user to update, then click UPDATE.
Adding users
-
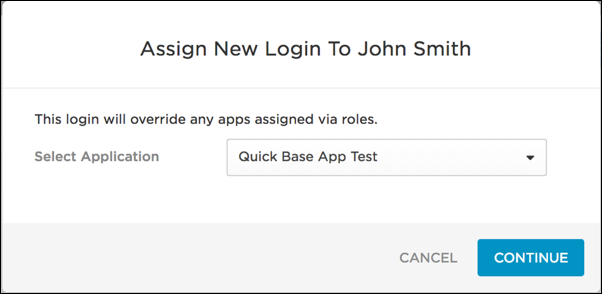
Select Applications and click the plus sign (+).

-
Select your application and click CONTINUE.
-
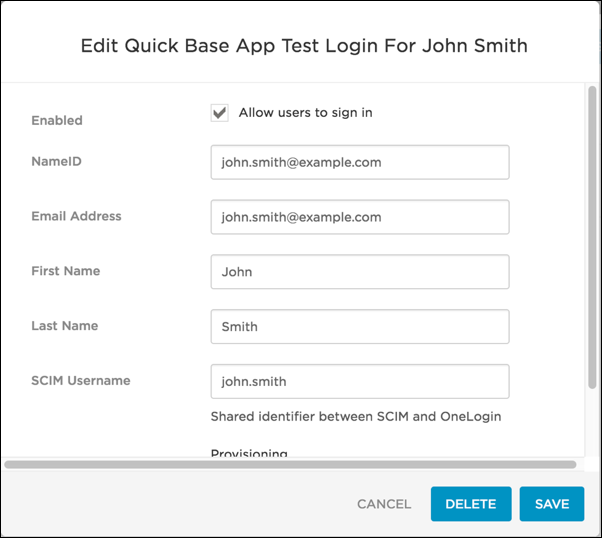
Update any information for the user, then click SAVE.
Restrictions
The maximum length for user first name, last name, email, and username is 255 characters.
Spaces are not allowed in username and email values.
Troubleshooting
To troubleshoot errors with provisioning, read Troubleshooting IdM provisioning in the Quickbase API Guide.